Track campaign ROI by starting with a clean measurement plan – before you launch creative, set budgets, or hire creators. In 2026, the teams that win are not the ones with the fanciest dashboards, but the ones that define success, instrument every touchpoint, and audit results with discipline. This guide walks you through the exact steps to calculate ROI, choose the right attribution approach, and connect influencer and paid media performance to revenue. Along the way, you will get formulas, examples, and checklists you can copy into your next brief.
Track campaign ROI: define the terms you will measure
ROI tracking breaks down fast when teams use the same words to mean different things. So first, align on definitions and decide which ones are primary versus supporting metrics. Keep this list in your campaign doc and require every stakeholder to use the same terms. That single habit reduces reporting debates later and makes optimization decisions faster.
- Reach: unique people who saw your content or ad at least once.
- Impressions: total times your content or ad was shown, including repeats.
- Engagement rate: engagements divided by impressions or reach (state which). Example: (likes + comments + saves + shares) / impressions.
- CPM (cost per mille): cost per 1,000 impressions. Formula: (spend / impressions) x 1,000.
- CPV (cost per view): spend divided by video views (use a defined view standard, such as 2-second or 3-second views).
- CPA (cost per acquisition): spend divided by conversions (purchase, lead, install – define it).
- Conversion rate: conversions divided by clicks or sessions (state which).
- Whitelisting: running paid ads through a creator’s handle (also called creator licensing). This changes how you track and attribute performance because the ad is delivered via the creator identity.
- Usage rights: permission to reuse creator content on your channels or in ads, usually time-bound and sometimes platform-specific.
- Exclusivity: limits on a creator working with competitors for a period. This affects pricing and can change ROI by reducing competing messages.
Takeaway: Put these definitions in your brief and reporting template. If you cannot define the conversion event and the denominator for engagement rate, you cannot compare performance across creators or channels.
Set ROI goals that match the campaign type (and the buying cycle)

Not every online campaign should be judged on immediate purchases. A creator-led awareness push for a new product will often look weak on last-click revenue, even if it drives a meaningful lift in branded search and assisted conversions. Therefore, choose an ROI model that matches intent, then set a primary KPI and two supporting KPIs. You will still calculate financial ROI, but you will interpret it in context.
- Direct response (short cycle): primary KPI = purchases or qualified leads; support = CPA, conversion rate, MER (marketing efficiency ratio).
- Consideration (mid cycle): primary KPI = qualified site sessions or add-to-carts; support = view-through rate, email signups, assisted conversions.
- Awareness (long cycle): primary KPI = incremental reach or lift; support = branded search lift, video completion rate, cost per incremental reach.
When you need a single decision rule, use this: optimize to the closest measurable event to revenue that you can measure reliably. If purchases are noisy due to attribution gaps, optimize to qualified leads or add-to-carts, then validate with holdouts or geo tests.
Takeaway: Write down the campaign type, buying cycle length, and the “closest reliable proxy” to revenue. That becomes your optimization north star.
The core math: ROI, ROAS, profit, and payback
Marketers often report ROAS because it is easy to compute from ad platforms, but ROI is the metric finance cares about. Use both, and be explicit about which costs you include. For influencer campaigns, include creator fees, production costs, usage rights, whitelisting fees, agency fees, and paid amplification spend. For paid social, include media spend plus creative and tooling if you want a true ROI view.
ROAS (return on ad spend) formula: Revenue attributed to ads / Ad spend. If you spent $20,000 and attributed $60,000 in revenue, ROAS = 3.0.
ROI formula (basic): (Revenue – Cost) / Cost. If total cost is $30,000 and revenue is $60,000, ROI = (60,000 – 30,000) / 30,000 = 1.0, or 100%.
Contribution margin ROI is often more honest: replace revenue with contribution margin (revenue minus COGS and variable fulfillment). If your gross margin is 55%, then $60,000 revenue yields $33,000 gross profit. ROI on $30,000 cost becomes (33,000 – 30,000) / 30,000 = 0.10, or 10%.
Payback period matters for subscriptions: payback = CAC / monthly gross profit per customer. If CAC is $120 and monthly gross profit is $30, payback is 4 months.
Takeaway: Always report (1) ROAS, (2) ROI using total campaign cost, and (3) contribution margin ROI. The third number prevents “high revenue, low profit” surprises.
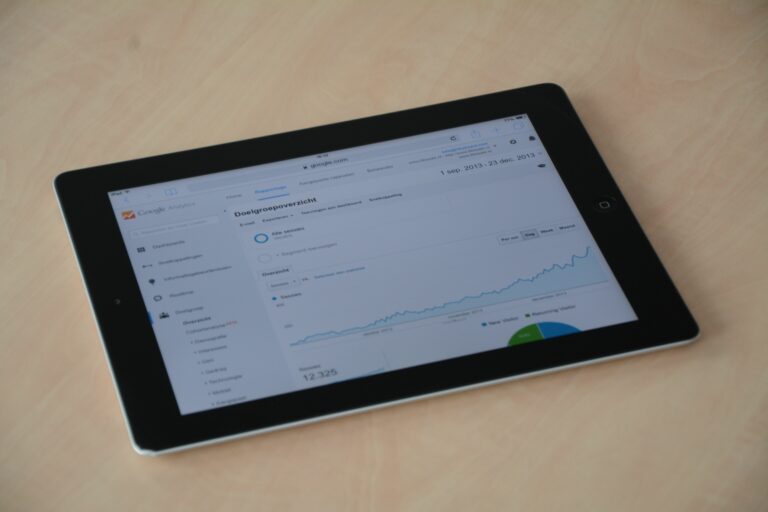
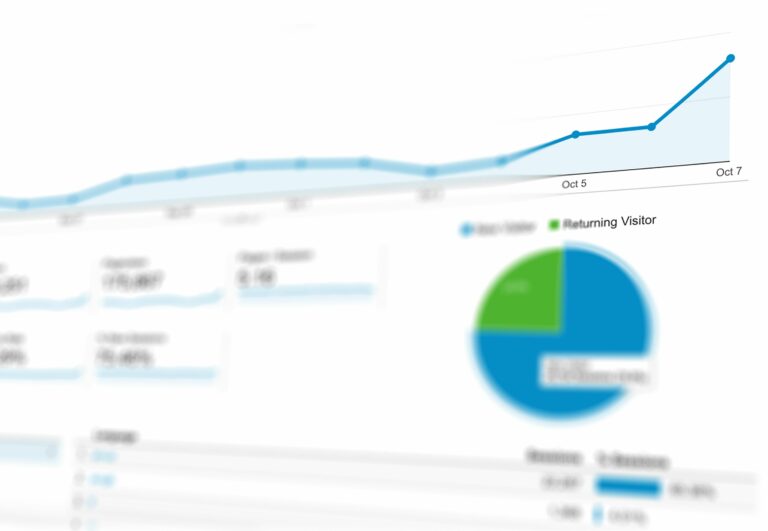
Measurement setup in 2026: tracking, pixels, UTMs, and clean naming
Once the math is clear, instrumentation is the make-or-break step. Start with a naming convention that works across influencer posts, paid ads, landing pages, and analytics tools. Consistent naming lets you join data later without manual cleanup. Next, implement UTMs and event tracking so every click and conversion is attributable to a source, even if platform attribution changes.
Use a simple naming system like: channel – partner – campaign – creative – date. Example: influencer – alexlee – springdrop – reelA – 2026-03-15. Put that string in your UTM campaign and in your internal campaign ID field.
- UTMs: add utm_source, utm_medium, utm_campaign, and optionally utm_content for creative variants.
- Landing pages: use dedicated pages per creator or per cohort when possible, so you can measure conversion rate differences.
- Event tracking: track view_content, add_to_cart, begin_checkout, purchase (or lead events) consistently.
- Server-side and consent-aware tracking: where possible, use server-side tagging and consent mode to reduce data loss, especially in regions with strict privacy requirements.
For a practical baseline, follow Google’s guidance on campaign URL building and UTM parameters: Google Analytics Campaign URL Builder documentation. Keep one external reference per paragraph so your team can verify standards without getting overwhelmed.
Takeaway: Before launch, test every link, every UTM, and every conversion event in a staging environment or with a small live budget. A one-hour QA session can save weeks of unusable reporting.
Attribution that works for influencer plus paid: choose a model, then validate
Influencer campaigns create demand that often converts later through other channels. Because of that, last-click attribution will undercount creator impact, while platform-reported view-through can overcount it. The solution is not to “pick the perfect model” but to pick a model you can run consistently, then validate it with experiments.
Start with three layers of attribution:
- Platform attribution: what Meta, TikTok, YouTube, and affiliate platforms report. Useful for optimization, not for final truth.
- Analytics attribution: GA4 or your analytics tool, using data-driven or rules-based attribution for cross-channel comparisons.
- Incrementality: holdout tests, geo experiments, or lift studies to estimate what would have happened without the campaign.
If you need a decision rule: use analytics attribution for weekly optimization, and incrementality for quarterly budget decisions. Weekly, you need directional signals; quarterly, you need causal evidence.
For teams running creator whitelisting, treat whitelisted ads as paid social with a creator identity. Track them with separate UTMs and separate ad set naming so you can compare: (a) creator organic post, (b) whitelisted paid, and (c) brand-handle paid. That comparison often reveals whether the creator identity improves CTR, conversion rate, or both.
Takeaway: Do not argue about attribution in the abstract. Decide which model answers which business question, then lock it for a reporting period so results are comparable.
How to track influencer ROI end to end (step-by-step workflow)
This workflow is designed for a mixed campaign that includes creators, paid amplification, and a landing page. It is intentionally operational so a marketer can run it without a data team, although data support will improve accuracy. For deeper measurement playbooks and reporting templates, you can also browse the InfluencerDB blog guides on influencer analytics and ROI and adapt the structure to your stack.
- Define the conversion event: purchase, qualified lead, trial start, or install. Write the exact event name and where it fires.
- Set the cost scope: creator fees, production, usage rights, whitelisting, agency, media spend. Decide what is included in “total cost.”
- Create tracking assets: UTMs per creator and per creative, unique discount codes (optional), and dedicated landing pages (ideal).
- Implement measurement: pixel or SDK events, server-side tagging if available, and QA with test conversions.
- Collect proof of delivery: screenshots or exports for reach, impressions, views, and engagement from creator insights.
- Normalize the data: store everything in a sheet with one row per creator post or ad, and consistent columns.
- Calculate unit economics: CPM, CPV, CPA, revenue per session, and contribution margin ROI.
- Audit for anomalies: spikes in clicks with no sessions, high reach with low engagement, or conversions that do not match backend orders.
- Decide actions: scale winners, refresh creative, renegotiate terms, or cut placements that fail your threshold.
Here is a simple example calculation you can replicate. Suppose a creator package costs $5,000, you spend $2,000 amplifying it, and you pay $500 for usage rights. Total cost = $7,500. The creator drives 1,200 sessions via UTMs, 60 purchases, and $9,000 revenue. ROAS on paid spend alone is misleading, so compute ROI on total cost: ROI = (9,000 – 7,500) / 7,500 = 0.20, or 20%. If gross margin is 50%, contribution margin is $4,500 and contribution ROI is (4,500 – 7,500) / 7,500 = -40%, which tells you the campaign needs a higher AOV, better conversion rate, or lower costs.
Takeaway: Run ROI calculations on both revenue and contribution margin. That single comparison tells you whether you have a measurement problem or an economics problem.
Tables you can use: KPI map and tool checklist
The fastest way to improve ROI tracking is to standardize what you measure by campaign goal. Use the table below to pick primary and secondary KPIs, plus the data source you should trust most for each. Then, use the second table to evaluate whether your current stack can support the measurement you want.
| Campaign goal | Primary KPI | Secondary KPIs | Best source of truth | Decision rule |
|---|---|---|---|---|
| Direct response sales | CPA or contribution ROI | ROAS, CVR, AOV | Backend orders + analytics | Scale if contribution ROI is positive for 2 cycles |
| Lead generation | Cost per qualified lead | Lead to SQL rate, CPL, landing CVR | CRM + analytics | Pause if lead quality drops below target for 2 weeks |
| App installs | CPA (install) or CAC (payer) | D1 retention, ROAS D7 | Mobile measurement partner | Shift budget to cohorts with higher payer rate |
| Awareness | Cost per incremental reach | VTR, brand search lift | Platform lift study + search trends | Keep if lift exceeds baseline by agreed threshold |
| Consideration | Qualified sessions | Add-to-cart rate, time on page | Analytics | Iterate creative if qualified session rate is low |
| Capability | What to check | Why it matters for ROI | Quick test |
|---|---|---|---|
| UTM governance | Consistent naming, no missing parameters | Prevents “unknown” traffic and broken joins | Export sessions by source and look for anomalies |
| Conversion event integrity | Events fire once, correct values, deduped | Stops inflated ROAS and false winners | Run test order and confirm in analytics and backend |
| Cost ingestion | Creator fees and media spend in one dataset | Enables true ROI, not just ROAS | Reconcile one week of invoices to reporting |
| Identity resolution | Cross-device and consent-aware measurement | Reduces undercounting and channel bias | Compare modeled vs observed conversions |
| Experimentation | Holdouts, geo tests, lift studies | Estimates incrementality and avoids over-attribution | Run a small holdout for one creator cohort |
Takeaway: If you can only improve one thing this quarter, improve conversion event integrity. Bad conversion data makes every ROI conclusion unreliable, even if everything else is perfect.
Common mistakes that quietly ruin ROI tracking
Most ROI failures are not dramatic. They are small process gaps that compound across creators, ads, and reporting cycles. Fixing them is usually cheaper than buying a new tool. Use this list as a pre-flight check before every launch.
- Mixing ROAS and ROI: reporting platform ROAS as if it includes creator fees and production.
- Counting discount code sales twice: once via code redemption and again via last-click analytics.
- Ignoring usage rights and exclusivity costs: those fees change total cost and can flip ROI.
- Comparing mismatched windows: 7-day click for one channel versus 1-day click for another.
- Optimizing to vanity metrics: high reach with low qualified traffic can look “successful” but does not pay back.
- Not separating whitelisted ads: creator-handle paid performance gets blended with brand-handle paid, hiding what actually worked.
Takeaway: Add a “dedupe and windows” step to your reporting SOP. It is boring, but it prevents the most common ROI reporting errors.
Best practices for 2026: make ROI tracking resilient to privacy and platform changes
Measurement will keep changing as privacy rules evolve and platforms adjust reporting. The best defense is a layered system that does not depend on a single dashboard. Build your process so you can still make decisions when one data source becomes noisy. For example, combine first-party tracking, consistent UTMs, and periodic incrementality tests.
- Use first-party data: capture email or account IDs where appropriate, then connect conversions back to campaigns in a privacy-safe way.
- Standardize reporting cadence: weekly optimization reports, monthly finance-ready ROI reports, quarterly incrementality reviews.
- Negotiate measurement terms: require creators to provide post-level insights exports and agree on reporting windows in the contract.
- Build creative learnings into briefs: document what hooks, formats, and offers drove qualified traffic, then reuse them.
- Follow platform and policy guidance: if you run influencer ads, ensure disclosures and ad policies are met. For US disclosure basics, reference the FTC endorsement guidance.
Finally, treat ROI tracking as a product, not a one-off report. Assign an owner, keep a changelog for tracking updates, and run a quarterly audit. That routine is what keeps your numbers comparable across quarters, even when the platforms shift.
Takeaway: Pair consistent UTMs and event tracking with quarterly incrementality tests. Consistency gives you trends; experiments give you truth.