Optimize images for web design by treating every file like a performance asset – sized correctly, compressed intelligently, and delivered in the right format for the page. For influencer marketers and creator-led brands, image speed is not just a technical detail: it affects landing page conversion, ad costs, and how quickly a shopper can evaluate a product. A sharp hero image that loads late still loses the click. Meanwhile, bloated product galleries can quietly drag down Core Web Vitals and organic rankings. This guide gives you a practical workflow, clear definitions, and decision rules you can apply today.
Optimize images for web design: what it means and why marketers should care
When people say “optimize,” they usually mean “make smaller.” In practice, optimization is a balance of three things: file weight, visual quality, and delivery method. You want the smallest possible file that still looks right on the devices that matter, delivered only at the sizes the browser needs. That matters for influencer campaigns because traffic is often mobile-first, coming from Instagram Stories, TikTok bios, YouTube descriptions, and paid social. If your landing page is heavy, you pay twice: users bounce and ad platforms see weaker post-click signals.
It also connects to measurement. A slow page can reduce tracked conversions, distort CPA, and make an influencer look less effective than they really are. If you are benchmarking creator performance, you want the landing page to be a stable variable, not a hidden bottleneck. For more on performance measurement and campaign fundamentals, keep an eye on the InfluencerDB Blog, where we regularly break down what moves results in real campaigns.
Concrete takeaway: Treat image optimization as part of campaign readiness. Before you judge an influencer’s traffic quality, confirm your landing page images are sized, compressed, and served responsively.
Key terms you need (CPM, CPV, CPA, engagement rate, reach, impressions, whitelisting, usage rights, exclusivity)
Define the metrics and deal terms early so your team speaks the same language. CPM is cost per thousand impressions, often used for awareness buys. CPV is cost per view, common for video placements. CPA is cost per acquisition, the metric most performance teams care about. Engagement rate is typically engagements divided by followers or impressions, depending on the platform and reporting method. Reach is unique accounts exposed to content, while impressions are total views including repeats.
On the commercial side, whitelisting usually means running paid ads through a creator’s handle or allowing the brand to use the creator’s content in ads. Usage rights define where and how long you can reuse assets (site, email, ads, OOH). Exclusivity restricts a creator from working with competitors for a period. These terms matter because optimized images are often part of the deliverables: product photos, banners, story frames, or landing page modules that will be reused across channels.
Concrete takeaway: Add image specs to your influencer brief and contract. If you are paying for usage rights or whitelisting, require high-resolution originals plus web-optimized exports.
The image optimization workflow: audit, resize, compress, and deliver
A repeatable workflow prevents “random compression” and keeps quality consistent across campaigns. Start with an audit: list every image type on the page (hero, product gallery, UGC tiles, logos, icons, blog thumbnails). Next, map each image to its maximum display size on mobile and desktop. Then you create exports at the right dimensions and compress them to a target weight. Finally, you deliver responsive versions via srcset and modern formats where possible.
Here is a practical step-by-step you can hand to a designer or developer:
- Step 1 – Inventory: Export a list of image URLs from the page and note their rendered size (Chrome DevTools can show this).
- Step 2 – Set targets: Define max widths for each slot (for example, hero 1600px, product image 1200px, thumbnail 400px).
- Step 3 – Choose formats: Use AVIF or WebP for photos when supported; keep SVG for logos and icons.
- Step 4 – Compress: Apply lossy compression for photos, lossless for UI assets when needed.
- Step 5 – Implement responsive delivery: Use
srcsetandsizesso the browser picks the smallest acceptable file. - Step 6 – Validate: Re-test page speed and visual quality on real devices, not just desktop.
Concrete takeaway: If you do nothing else, stop shipping 3000px images into 375px slots. Right-sizing is usually the biggest win.
Format and sizing decision rules (with a practical table)
Format choice is where teams waste time debating preferences. Instead, use decision rules. Photos with gradients and fine detail compress better in AVIF or WebP than in PNG. Logos and simple shapes should be SVG, which stays crisp at any size. PNG is still useful for images that need hard transparency and must look pixel-perfect, but it is often heavier than necessary. JPEG remains a safe fallback for broad compatibility, especially if your stack cannot serve modern formats yet.
| Image type | Best format | Typical max width | Target file size | Notes |
|---|---|---|---|---|
| Hero banner photo | AVIF or WebP (JPEG fallback) | 1600 to 2000px | 150 to 300KB | Use responsive variants; avoid text baked into the image when possible. |
| Product gallery | WebP or AVIF | 1200 to 1600px | 100 to 250KB | Keep consistent aspect ratios to reduce layout shift. |
| UGC tiles | WebP | 600 to 900px | 60 to 150KB | Batch compress; these add up quickly on scroll-heavy pages. |
| Logos and icons | SVG | Vector | Under 20KB | Minify SVG; avoid embedding huge metadata. |
| UI illustrations | SVG or WebP | 1000 to 1600px | 50 to 200KB | If SVG gets complex, export to WebP for smaller size. |
Concrete takeaway: Pick one default for photos (WebP) and one for vectors (SVG), then add AVIF where your CMS or CDN supports it. Consistency reduces production time.
Compression, quality settings, and simple formulas you can use
Compression is not guesswork if you set thresholds. Start by deciding what “good enough” looks like for your brand: skin tones, product textures, and typography edges are the usual failure points. Then set a target file size range by placement, like the table above. A quick rule: if an image is above 300KB on a mobile landing page, it should justify its weight. Otherwise, compress further or reduce dimensions.
Use simple calculations to connect image weight to campaign outcomes. Page weight affects load time, and load time affects conversion rate. While the exact relationship varies, you can still model impact to prioritize work. Example framework:
- Estimated time saved (seconds) = (bytes reduced) / (effective throughput bytes per second)
- Incremental conversions = sessions x (new conversion rate – old conversion rate)
- CPA impact = spend / conversions
Example: You cut 2MB from a landing page by optimizing a hero and gallery. On a 10 Mbps mobile connection (about 1.25 MB/s effective), that is roughly 1.6 seconds saved. If you drive 50,000 sessions from creators and paid amplification, and conversion rate moves from 2.0% to 2.2%, that is 100 extra conversions. If spend is $50,000, CPA drops from $50 to about $45.45. Even if the lift is smaller, the economics often justify the effort.
For a grounded overview of how Google evaluates page experience and performance signals, reference Google Search Central guidance on page experience.
Concrete takeaway: Tie optimization to CPA. When stakeholders see a plausible conversion lift model, image work stops being “design polish” and becomes performance engineering.
Responsive images, lazy loading, and Core Web Vitals (what to implement)
Once files are optimized, delivery is the next lever. Responsive images let the browser choose the best file for the device. Use srcset with multiple widths and a sizes attribute that matches your layout. Lazy loading helps on long pages, but you should avoid lazy-loading the primary hero image because it can hurt Largest Contentful Paint. Instead, prioritize above-the-fold images and lazy-load below-the-fold galleries, UGC grids, and blog thumbnails.
Also watch layout stability. If images load without reserved space, the page jumps, which can hurt Cumulative Layout Shift and user trust. Always set width and height attributes or use CSS aspect-ratio boxes. For influencer traffic, this matters because users often arrive with low patience and high intent. A page that shifts while they try to tap “Add to cart” bleeds revenue.
Implementation checklist you can hand to a developer:
- Provide
srcsetvariants at 400, 800, 1200, and 1600px for key photos. - Set
sizesbased on breakpoints, not guesses. - Use
loading="lazy"for below-the-fold images only. - Preload the hero image if it is the LCP element.
- Always reserve space with width and height or aspect ratio.
Concrete takeaway: If you fix only one Core Web Vitals issue with images, fix layout shift by reserving space. It is fast to implement and immediately noticeable.
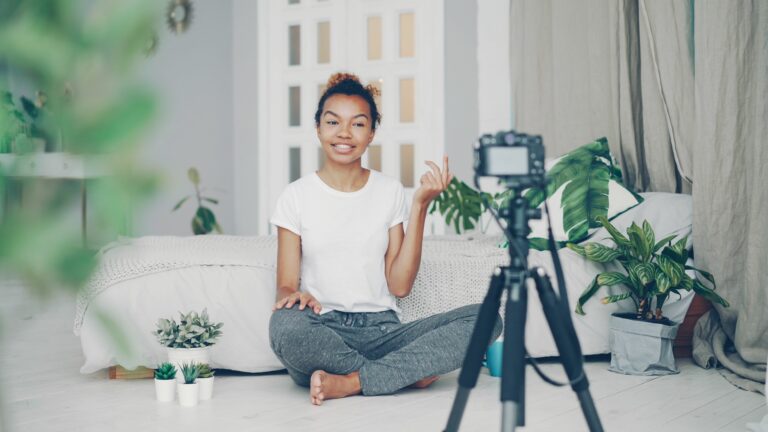
Influencer landing pages: align image choices with campaign goals
Influencer traffic behaves differently from search traffic. Visitors often land on a specific product, a limited-time bundle, or a creator-curated collection. That means your images should support fast decision-making: clear product shots, minimal clutter, and consistent framing. If you are running whitelisted ads from creator handles, you also need visual continuity between the ad creative and the landing page hero. Otherwise, the user feels a disconnect and bounces.
Here is a practical way to align images with funnel stage:
- Top of funnel (CPM focus): Use lightweight lifestyle imagery and fast-loading UGC tiles to build trust quickly.
- Mid funnel (CPV focus): Pair short video with a small set of crisp supporting images, not a 20-image gallery.
- Bottom funnel (CPA focus): Prioritize product detail images that answer objections: size, texture, ingredients, before and after, and packaging.
When you report results, remember that image performance can change the apparent efficiency of a creator. If one creator sends the same clicks but your page loads slower for their audience segment, CPA can look worse without being their fault. Build a habit of checking page performance before concluding a creator underperformed.
Concrete takeaway: For creator-specific landing pages, cap initial image payload. Aim for a fast hero, 3 to 6 product images, and lazy-load the rest.
Tooling and process: who owns what (with a useful table)
Optimization fails when ownership is unclear. Designers export huge assets, developers ship them, and marketing only notices when paid performance dips. A simple RACI-style process prevents that. You do not need more meetings; you need a checklist and a gate before launch. If you use a CMS, set automatic resizing and format conversion at upload, then enforce naming conventions so teams can find the right variants.
| Phase | Task | Owner | Deliverable | Quality gate |
|---|---|---|---|---|
| Design | Define image slots and max rendered sizes | Designer | Layout spec with dimensions | No slot without a max width and aspect ratio |
| Production | Export responsive variants and compress | Designer or content producer | WebP or AVIF set plus fallback | Each file meets target KB range |
| Implementation | Add srcset, sizes, lazy loading rules | Developer | Responsive markup in templates | Hero not lazy-loaded; dimensions reserved |
| QA | Test on mobile and measure LCP and CLS | Marketing ops | Performance snapshot | Pass thresholds agreed for campaigns |
| Launch | Monitor conversion rate and bounce rate | Growth marketer | Post-launch report | Investigate if CPA spikes after creative changes |
Concrete takeaway: Add an “image payload” check to your launch checklist. If the page exceeds your KB budget, delay launch or remove non-essential images.
Common mistakes (and how to fix them fast)
Most image problems are predictable. Teams upload a single “high-res” file and let the browser scale it down, which wastes bandwidth. Another common issue is using PNG for photos because it “looks better,” even when WebP would be smaller at the same perceived quality. You also see lazy loading applied everywhere, including the hero, which can slow perceived load. Finally, many pages forget to reserve space, causing layout shift that makes the site feel unstable.
- Mistake: Shipping 2x or 3x larger dimensions than needed. Fix: Export to the max rendered size plus a reasonable retina variant.
- Mistake: Using PNG for photography. Fix: Convert to WebP or AVIF and compare at the same visual quality.
- Mistake: No responsive markup. Fix: Implement
srcsetandsizesin templates. - Mistake: Hero image loads late. Fix: Preload the hero and avoid lazy loading above the fold.
- Mistake: Layout shift from images. Fix: Set width and height or use aspect ratio containers.
Concrete takeaway: If you are under time pressure, right-size and convert format first. Those two changes typically deliver the biggest reduction in bytes.
Best practices checklist for teams running creator campaigns
Best practices are only useful if they are easy to apply. Use this checklist before you send traffic from creators or whitelisted ads. Start with the landing page hero and product gallery because they drive both perception and payload. Then confirm that your image choices support your measurement plan, especially if you are optimizing toward CPA. If you want a deeper view into how creative and landing page factors affect influencer ROI, browse the for related playbooks.
- Set a page-level image budget (for example, under 1.5MB above the fold on mobile).
- Use WebP or AVIF for photos, SVG for logos and icons.
- Export multiple sizes and implement
srcsetandsizes. - Reserve space to prevent layout shift.
- Preload the LCP image and avoid lazy loading it.
- Compress UGC grids aggressively and lazy-load them.
- Document usage rights and keep original assets for future exports.
Finally, keep your compliance and platform rules in mind when you reuse creator assets. If you are running whitelisted ads or repurposing UGC on-site, you need clear permissions and disclosures where required. For disclosure principles that often apply to influencer content and endorsements, review the FTC Endorsement Guides resources.
Concrete takeaway: Treat optimized images as part of your creator ops system. When you standardize specs, you ship faster and your performance data gets cleaner.