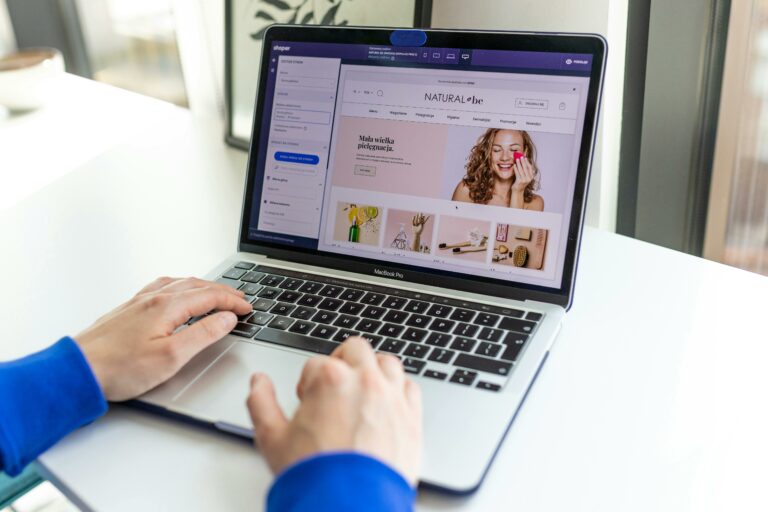
Homepages vs landing pages is not a design debate – it is a conversion decision that can make or break influencer campaign ROI. When a creator sends a spike of high-intent clicks, the page you choose determines whether visitors understand the offer fast, trust it, and take the next step. A homepage can work when you need broad discovery and brand proof, while a landing page usually wins when you need a single action like email capture or purchase. The best choice depends on traffic temperature, offer complexity, and how much context the creator already provided. Below is a practical framework you can use to pick the right destination, measure it cleanly, and improve results without guessing.
Homepages vs landing pages: the core difference in one sentence
A homepage is built to help many audiences navigate many options, while a landing page is built to help one audience complete one action. That difference matters more in influencer marketing than in many other channels because influencer traffic is bursty and attention is fragile. Visitors often arrive on mobile, mid-scroll, and with a mental model shaped by the creator’s story. If the page forces them to hunt, you lose momentum. Therefore, your first job is to match page intent to visitor intent.
Takeaway decision rule: If you can state the goal as one verb (buy, book, download, join), start with a landing page. If the goal is exploration (learn, compare, browse), a homepage or hub page can be appropriate.
Define the metrics and terms you will use before you choose a page

Before you argue about layout, align on measurement. Influencer teams often mix brand metrics and performance metrics, then blame the page when results look muddy. Start by defining the core terms and how you will calculate them for this campaign. That way, “better” has a number attached to it.
- Reach – estimated unique people who saw the content.
- Impressions – total views, including repeat views by the same person.
- Engagement rate – engagements divided by impressions (or reach) times 100. Example: (2,400 likes + comments + saves) / 80,000 impressions = 3%.
- CPM (cost per thousand impressions) – spend / impressions x 1,000.
- CPV (cost per view) – spend / video views.
- CPA (cost per acquisition) – spend / conversions (purchase, lead, signup).
- Whitelisting – running paid ads through a creator’s handle, typically with permissions and time limits.
- Usage rights – permission to reuse creator content on your channels (site, ads, email) for a defined duration and placements.
- Exclusivity – creator agrees not to promote competing brands for a defined period and category.
For measurement standards and definitions that align with how many marketers report performance, you can reference the IAB’s guidance on digital ad measurement at IAB guidelines. Use it to keep internal reporting consistent, especially when you blend influencer posts with paid amplification.
Takeaway checklist: Write down your primary KPI (one), your secondary KPI (one), and the exact formula for each before you pick the destination URL.
When a homepage is the right destination for influencer traffic
Homepages earn their keep when the visitor needs reassurance and context more than speed. This happens when your brand is new, the product category is high-consideration, or the creator’s content is broad and not tied to a single SKU. A homepage also helps when you want visitors to self-segment, for example by skin type, budget, or use case. In addition, if your site navigation, search, and category pages are strong on mobile, a homepage can act like a “trust lobby” before users go deeper.
However, a homepage must be prepared for influencer traffic. That means you should tighten the above-the-fold message, add creator-relevant proof, and remove distractions that do not help the visitor decide. If your homepage hero rotates, lock it during the campaign so the creator’s audience sees the promised offer. Also, ensure the homepage loads fast on mobile, because influencer clicks are often impatient.
- Best fit scenarios: brand launch, multi-product discovery, PR-driven influencer pushes, retail locator needs.
- Homepage upgrades for influencer bursts: campaign banner, creator quote, “as seen on” logos, clear category tiles, and a prominent search bar.
Takeaway decision rule: Use a homepage when you cannot predict what the audience wants to buy, but you can predict what they need to trust.
When a landing page is the right destination for influencer traffic
Landing pages usually outperform homepages when the creator’s content is specific and the next step is clear. If a creator demonstrates one product, shares a discount code, or tells a personal story that maps to one pain point, a landing page keeps that narrative intact. It also reduces cognitive load by removing navigation, competing offers, and unrelated content. As a result, you get cleaner attribution and more stable conversion rates.
Landing pages are also the safer choice when you plan to whitelist creator content. Paid amplification scales clicks quickly, and a homepage can buckle under the weight of too many options. A landing page gives you control over message match, tracking, and the exact conversion event. If you need compliance elements like disclosures, terms, or eligibility, you can place them without cluttering your global site.
- Best fit scenarios: single SKU push, lead magnet, waitlist, app install, webinar signup, limited-time bundles.
- Landing page must-haves: headline that mirrors the creator hook, one primary CTA, social proof, FAQs, and a clear offer box.
Takeaway tip: Put the creator’s promise in the first 10 words of the landing page headline, then repeat the offer in the CTA button text.
A practical framework to choose the destination page
Use this five-step framework to pick the right page without overthinking. First, classify the traffic temperature: cold (new to brand), warm (knows category), or hot (ready to buy). Second, map the creator content to one intent: learn, compare, try, buy. Third, decide whether you need self-segmentation; if yes, a homepage or curated hub can help. Fourth, decide how strict your attribution needs to be; landing pages make it easier to isolate performance. Finally, check operational constraints like dev time, legal review, and inventory.
To keep the decision consistent across campaigns, score each factor from 1 to 5 and pick the page type with the higher total. For example, if traffic is hot, attribution needs are high, and the offer is narrow, the landing page score will win. On the other hand, if the creator is doing a broad brand story and your product line is wide, the homepage score may be higher. This simple scoring method prevents “opinion wars” and makes post-campaign learning easier.
| Factor | Signals | Better choice | What to do next |
|---|---|---|---|
| Traffic temperature | Hot intent from demo, code, strong CTA | Landing page | Remove nav, tighten CTA, add FAQs |
| Offer breadth | Many products, many use cases | Homepage | Add category tiles and a campaign banner |
| Message match | Creator promise is specific | Landing page | Mirror creator wording in headline |
| Need for trust | New brand, high price, sensitive category | Homepage | Surface proof, reviews, and policies above fold |
| Attribution strictness | Multiple creators, paid amplification | Landing page | Use dedicated URL, UTM, and event tracking |
Takeaway: If two factors strongly point to landing page (hot intent and strict attribution), default to a landing page even if your homepage is “good.”
How to measure performance: formulas, examples, and clean tracking
Once you pick the destination, measurement is where teams win or lose. Start with clean URLs: one URL per creator or per content cluster, plus UTMs that reflect platform, creator, and post type. Then, ensure your analytics records the right events: view content, add to cart, start checkout, purchase, or lead submit. If you are comparing homepages vs landing pages, keep everything else constant: same creator, same offer, same time window, and similar posting format.
Here are simple calculations you can use in your reporting. Suppose you pay $6,000 for a creator package that generates 120,000 impressions and 2,400 clicks. Your CPM is $6,000 / 120,000 x 1,000 = $50. Your CPC is $6,000 / 2,400 = $2.50. If the landing page produces 96 purchases, your CPA is $6,000 / 96 = $62.50. Now you can compare that to the homepage path, not by “vibes,” but by CPA and conversion rate.
| Metric | Formula | Example inputs | Example result |
|---|---|---|---|
| Conversion rate | Conversions / Clicks | 96 purchases / 2,400 clicks | 4% |
| CPA | Spend / Conversions | $6,000 / 96 | $62.50 |
| CPM | Spend / Impressions x 1,000 | $6,000 / 120,000 x 1,000 | $50 |
| Revenue per click | Revenue / Clicks | $9,600 revenue / 2,400 clicks | $4.00 |
| ROAS | Revenue / Spend | $9,600 / $6,000 | 1.6 |
Finally, document what counts as a conversion. If you run a lead campaign, define whether a conversion is a form submit, a qualified lead, or a booked call. For guidance on building reliable measurement and avoiding misleading attribution, Google’s analytics documentation is a solid reference: Google Analytics Help.
Takeaway: Report at least one efficiency metric (CPA or CPC) and one quality metric (qualified lead rate, refund rate, or revenue per click) so the page choice does not optimize for the wrong outcome.
Build the page for influencer traffic: a checklist you can hand to a designer
Influencer traffic behaves differently from search traffic. People arrive with emotion and context from the creator, not from a keyword query. Therefore, your page should prioritize message match, speed, and proof. Start with a headline that repeats the creator’s claim in plain language. Next, show the product or offer immediately, ideally with a short video or image that matches the creator’s format. Then, make the CTA obvious and repeat it after key sections like benefits and FAQs.
Also, plan for mobile first. Use short paragraphs, large tap targets, and minimal popups. If you need an email capture, consider delaying it until the visitor scrolls, because aggressive popups can clash with the creator’s trust transfer. For ecommerce, include shipping, returns, and delivery timing near the CTA, since those are common drop-off reasons. If you want more tactical marketing playbooks and measurement ideas, browse the InfluencerDB.net blog resources and adapt the templates to your workflow.
- Above the fold: creator-matched headline, offer summary, primary CTA, key proof point.
- Mid page: benefits, how it works, comparison to alternatives, creator quote or UGC.
- Bottom: FAQs, policies, secondary CTA, contact option.
Takeaway: If the visitor cannot explain the offer in five seconds, the page is not ready for influencer traffic.
Common mistakes when choosing between homepages and landing pages
The most common mistake is sending influencer clicks to a generic homepage that has no message match. Visitors land, do not see the creator’s promise, and bounce. Another frequent error is building a landing page that looks great but lacks trust elements like reviews, policies, and clear pricing. Teams also forget to coordinate inventory and promo codes, which turns high-intent traffic into frustration. Finally, many campaigns compare results across different creators and call it a page test, even though the audience and content are different.
- Using one URL for all creators, which hides who drove what.
- Letting the homepage hero rotate, so half the audience sees the wrong message.
- Asking for too much information on a lead form, which lowers completion rate.
- Measuring only clicks, not downstream quality like qualified leads or refunds.
Takeaway: If you cannot isolate the page variable, you are not testing homepages vs landing pages – you are just collecting noise.
Best practices: a simple testing plan for your next influencer campaign
A clean test does not need fancy tooling, but it does need discipline. Start with one creator and one offer. Then create two destinations: a campaign-ready homepage variant (or curated hub) and a dedicated landing page. Split traffic by using two different links in two similar pieces of content, such as two Stories frames or two pinned comments on separate days. Keep the posting time, CTA language, and incentive consistent. After that, evaluate results using conversion rate and CPA, not just clicks.
Next, iterate based on what you learn. If the landing page wins on conversion but loses on average order value, add a bundle section or cross-sell module without adding navigation. If the homepage wins on time on site but loses on purchases, add a campaign banner that deep-links into the relevant collection. Also, if you plan to whitelist, treat the landing page as the default destination because paid scaling magnifies friction. For disclosure and ad policy basics that can affect how you present offers and claims, review the FTC’s endorsement guidance: FTC influencer endorsement guidelines.
- Week 1: launch with landing page, measure baseline CPA and conversion rate.
- Week 2: test homepage variant for the same creator and offer.
- Week 3: roll out the winner to other creators, keep URLs creator-specific.
Takeaway: Pick one primary KPI, run a two-link test, and ship the winner fast – influencer traffic rewards speed and clarity.
Quick recommendations by campaign type
If you need a fast answer, match the destination to the campaign objective. Product launches with a single hero SKU usually belong on a landing page. Brand awareness pushes can start on the homepage, but only if you add a campaign module that mirrors the creator’s message. For lead generation, a landing page with a short form and strong proof is typically best. For retail and omnichannel, a homepage with a store locator entry point can outperform a generic landing page because the visitor’s goal is location-based.
- Discount code campaign: landing page with code pre-applied and clear terms.
- Multi-creator seeding: landing page templates per persona, not one page for everyone.
- Evergreen affiliate: homepage or collection page, but add a creator-specific module when possible.
Takeaway: The “right” destination is the one that preserves the creator’s story and removes the next-step friction.